
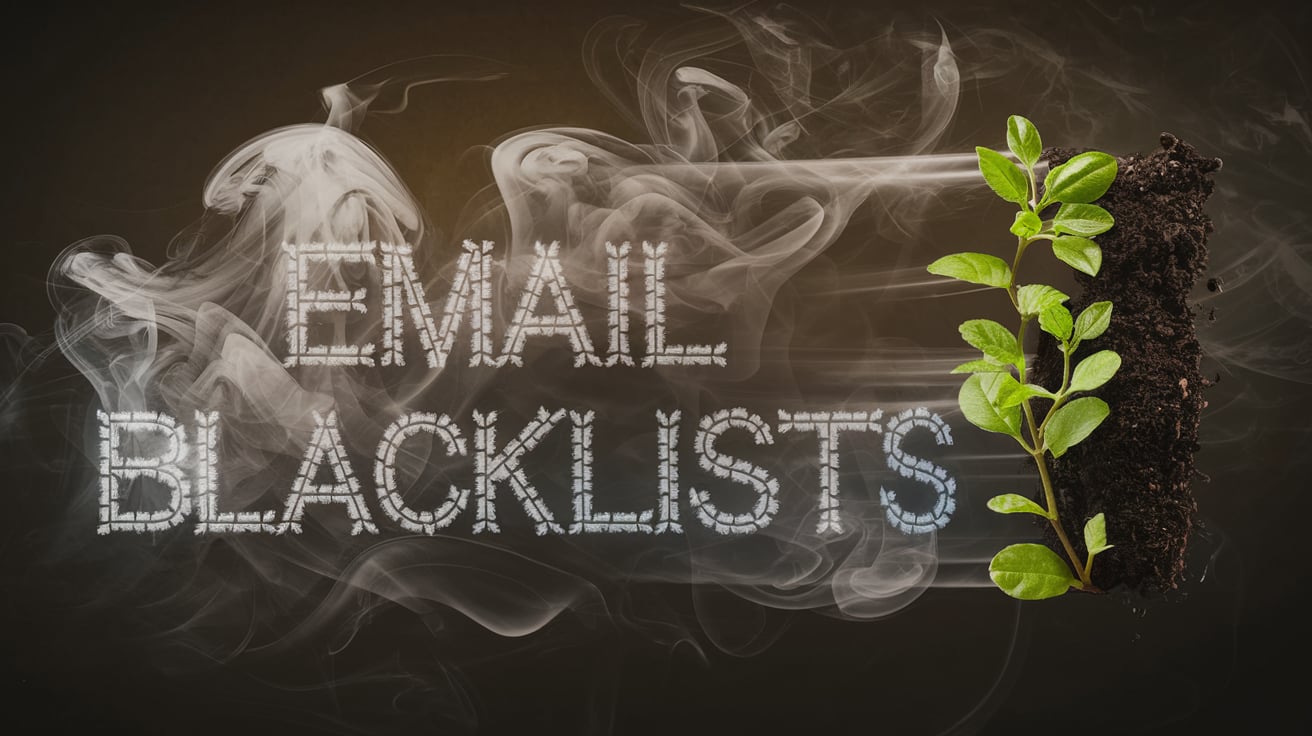
Uh oh. You hit send on your latest cold email campaign but aren’t seeing the usual flood of opens. Instead, crickets. If your deliverability suddenly dropped off a cliff, you may have landed on an email blacklist.
These spammer naughty lists can seem arbitrary, but they’re just one of the hurdles between you and your prospect’s inbox. With the right knowledge, recovering from blacklisting doesn’t have to spell disaster for your sender reputation.
In this comprehensive guide, we’ll demystify exactly what email blacklists are, how they work, why good senders end up on them, and most importantly—tips to avoid and escape email blacklisting purgatory. Master the art of inbox deliverability and laugh in the face of spam filters. Let’s do this.
What is an Email Blacklist?
You’ve spent hours crafting the perfect cold email campaign. The messaging is clear, the design is sleek, and your list is full of targeted prospects. You hit send, lean back, and wait for the leads to start pouring in. But instead of lighting up your inbox, all you get are frustrating bounce notifications. What gives?
Chances are, you’ve been added to an email blacklist. Don’t panic—you’re not alone. Even the most well-meaning senders can find themselves locked out of inboxes if they aren’t careful. In this section, we’ll break down exactly what an email blacklist is, who controls them, and how they block your emails from being delivered.
A Naughty List for Unwanted Senders
An email blacklist is essentially a database of IP addresses and domains that have been flagged as potential spam sources. Major email providers like Gmail and Outlook use blacklists to automatically filter out messages from suspicious senders before they ever reach the inbox.
Here’s how it works:
When you send an email, the recipient’s email server checks your IP address against their blacklist database. If you’re on the list, your message is blocked or sent straight to the spam folder. This happens before any content-based spam filters even get a chance to scan your email.
Blacklists are kind of like the bouncers at an exclusive nightclub. If you’re on the naughty list, you don’t get in no matter what. Of course, no one wants to be excluded from the party that is your prospect’s inbox. So how do you stay off email blacklists?
Public Enemy #1: Spammers
To understand how legitimate senders end up on blacklists, you first need to know the types of unwanted senders that blacklists aim to block:
Spammers: The classic blacklist targets. These are bad actors intentionally sending deceptive, malicious, or scam emails on a massive scale. Think phishing schemes, spoofed addresses, and shady sales pitches.
Sloppy senders: Well-meaning businesses that don’t follow email best practices. For example, buying email lists, having high complaint rates, or abruptly increasing volume. Their deliverability suffers unintentionally due to naiveté.
Hackers: Email accounts that have been compromised and used by bad actors to distribute malware or spam. The original owner likely has no idea their domain is blacklisted.
Spambots: Automated bots designed to churn out spam at scale by scraping the web for emails and blasting messages indiscriminately. Their only purpose is to bombard inboxes.
As you can see, blacklists take a heavy-handed approach. They make no distinction between intentional spamming activity and unintentional mistakes. One too many complaints or a bought email list can land you in the same category as the most vicious spammers.
This “guilty until proven innocent” tactic makes sense when you consider the sheer volume of spam clogging up inboxes. But it creates headaches for legitimate businesses who get caught in the crossfire.
The Gatekeepers: ISPs, ESPs, and Blacklist Operators
Now that you know the kinds of senders blacklists try to stop, let’s look at who controls them:
Internet Service Providers (ISPs): ISPs like Comcast, Verizon, and AT&T maintain their own internal blacklists to protect their customers’ inboxes. Gmail and Outlook also act as ISPs and have their own private lists.
Email Service Providers (ESPs): Leading ESPs including MailChimp and Constant Contact also keep proprietary blacklists. However, they rarely share these lists.
Blacklist Operators: There are also public blacklist databases operated by third-party companies:
- Spamhaus operates renowned lists like the Spamhaus Block List.
- SpamCop compiles blacklists based on spam reports and spam traps.
- Barracuda generates blacklists from addresses that send spam to its security services.
Major ISPs and email providers draw upon these databases to supplement their own private lists and spam filters. In essence, they outsource part of blacklist management to specialists.
Spam Traps: Blacklist operators use spam traps—pristine email addresses that don’t belong to real users—to identify and blacklist spammers. Any sender mailing to a spam trap gets immediately added to blacklists.
Complaints: Recipients clicking “mark as spam” also feeds data to blacklists. Too many complaints against your sending IP can get you blacklisted across providers.
The Anatomy of an IP-Based Blacklist
So blacklists are essentially databases of IP addresses associated with spam or abusive sending. Here’s a peek at what one may look like:
| IP Address | Blacklist Operator | Date Added | Reason |
|---|---|---|---|
| 192.168.1.1 | Barracuda | 3/12/2022 | Spam Trap Triggered |
| 172.217.4.17 | Spamhaus | 1/24/2022 | Excessive Complaints |
| 10.201.102.76 | SpamCop | 11/30/2021 | Sudden Volume Spike |
Pretty straightforward, right? When your IP gets flagged by one of these lists, it can quickly spread to others. Before you know it, you’re blocked from delivering to AOL, Yahoo, Gmail, Microsoft—you name it.
Some blacklists also include full domains in addition to IP addresses. For example, if @annoyingspamco.com gets added to a blacklist, any email sent from that domain could be blocked even if the IP is clean.
Criteria Varies Between Blacklists
There’s no universal criteria that lands senders on blacklists. Each list operator uses their own rules and thresholds for identifying potential spam.
For example, Barracuda may blacklist an IP after 5 spam trap triggers, while Spamhaus waits for 10. SpamCop grades accounts using a point system based on complaint rate and severity.
Most also offer an appeal process if you believe you’ve been unfairly blacklisted. However, you’ll need to thoroughly clean up your sending practices before requesting removal.
The bottom line is this: Blacklists aren’t perfect. Their effectiveness relies on using the least amount of data possible to make split-second verdicts on billions of emails per day. As such, mistakes can happen.
But for savvy senders, staying off email blacklists simply takes proper due diligence. Do your homework on list hygiene, sending infrastructure, and deliverability best practices and you should have no trouble keeping your IP squeaky clean.
Why Do Senders Get Blacklisted?
So how exactly does a well-intentioned business end up on an email blacklist, locked out of inboxes?
It basically comes down to two key factors:
- Bad sending reputation: Actions that get your IP flagged as a potential spammer, like buying email lists or having a high complaint rate.
- Sending infrastructure issues: Technical problems like invalid SPF records, unusual traffic spikes, or security breaches.
Let’s explore the common blacklist triggers in detail:
Spam Complaints
The number one reason IPs get blacklisted is simple – too many spam complaints.
When recipients click “report spam” or “mark as junk”, it directly feeds data to blacklist databases. Each complaint is logged and counted against your sending reputation.
Enough complaints in a short time can automatically trigger blacklisting without any human review.
There are two key ways spammers generate complaints:
Bad content: Irrelevant, low-quality emails that people don’t want cluttering up their inbox. For example, blasting generic sales pitches to purchased lists.
Bad contact data: Mailing users who never consented to or opted into your list. For example, scraped or purchased emails.
However, even carefully-targeted content can drive complaints if subscribers feel you email too frequently.
The threshold for blacklisting varies by operator but ranges from a few dozen to a few hundred complaints in a short period.
Avoiding Complaints
Here are some tips to minimize spam complaints:
- Send only to consenting, engaged subscribers who want to hear from you. Avoid purchased or scraped lists.
- Add an easy global unsubscribe link to every email. Make it effortless for disinterested users to opt out.
- Send relevant content and offers tailored to each subscriber segment’s interests. Avoid blasting every list with generic emails.
- Monitor complaint rates per campaign and list segment. Look for any spikes that may indicate disengaged or unsubscribed users still receiving mailings.
- Carefully clean your list by removing all hard bounces, one-time buyers, or inactive subscribers who haven’t opened in 6+ months.
Bad Email Hygiene
Sloppy list management practices can tank your sender reputation and lead to blacklisting. Signals like:
- High hard bounce rates
- Complaints from one-time buyers
- Sudden unsubscribes
All point to decaying list quality. Churning out emails to a high percentage of defunct or unengaged addresses reflects poorly on a sender.
Watch Your Bounce Rate
If over 2-3% of your campaign ends up bouncing, blacklist scrutiny kicks in.
Some common reasons for bounces:
- Invalid addresses – Mispelled or formatted emails.
- Inactive accounts – Users who changed jobs, emails, or passed away.
- Full inboxes – Recipients over quota so your email gets bounced by the ESP.
- Spam complaints – Recipients who clicked spam and triggered an autobounce from the ISP.
Frequently blasting lists with high inactive users or one-time buyers is a recipe for blacklisting.
Tips for List Hygiene
- Remove bounces ASAP. Monitor bounce reports and continuously scrub your lists of bad addresses.
- Active recipients only. Filter out any subscriber who hasn’t opened or clicked in 6+ months.
- Watch complaint metrics. Segment users by complaint rate and remove high complainers.
- Frequency caps. Limit send frequency, especially for less engaged segments.
- List washing. Run your lists through an email verification service to identify high-risk addresses.
Healthy list hygiene takes continuous effort, but it’s critical for avoiding blacklists.
Purchased Email Lists
Buying email lists is quite possibly the fastest way to sabotage your sender reputation. Why?
- Highly inactive users – These databases are often outdated, full of defunct addresses from years ago. Expect sky-high bounce rates.
- No consent – Users never opted in to receive your emails. Expect mass spam complaints.
- Spammer associations – Legitimate businesses avoid purchased lists. Using them brands you as a probable spammer.
Even worse, some unscrupulous list sellers pepper their databases with spam traps specifically designed to detect and blacklist buyers.
Bottom line: avoid purchased email lists at all costs. There are no shortcuts to building a quality subscriber base earned through engagement and consent.
Safely Building Your List
- Opt-in forms – The best way to build engaged subscribers is through opt-in forms, content upgrades, etc.
- Partnerships – Coordinate co-marketing campaigns where partners send joint offers to their subscriber lists.
- Retargeting ads – Use display ads to re-engage website visitors and direct them to opt-in landing pages.
- Lead enriching – Upload your customer lists to tools like ZoomInfo to append up-to-date contact info for more recipients.
It takes more work, but organic list building based on genuine consent avoids issues down the road.
Sudden Volume Spikes
Raising red flags with a massive uptick in volume is another common path to blacklisting.
Sudden changes make ESPs suspect you purchased lists or are ramping up spammy activity. Even if you’re mailing clean lists, drastic volume surges can spell trouble.
Say you normally send 10,000 emails per month. If you suddenly blast out 100,000 in a day – a 10x increase – blacklist scrutiny kicks in.
Ramp Volume Gradually
- Build volume over several weeks/months as your lists and engagement naturally grow.
- Crank up email frequency for a specific segment gradually while monitoring complaints.
- Add new segments from a lead source? Mail them separately at low volumes until you gauge engagement.
- When launching a large one-time campaign, consider pacing sends over multiple days to avoid spikes.
Yes, throttling send volume means your emails take longer to deploy. But slow and steady consistency avoids blacklisting mishaps. Reputations aren’t built overnight.
Hacked Accounts
Another common yet unfortunate blacklist scenario – your email accounts get compromised.
Hackers who gain access to your domain can use it to spam out malware, phishing scams, and other malicious emails. Even if you aren’t the one sending them, your domain takes the fall.
Once your domain or IP starts distributing mass malicious mailings, blacklisting and blocking happens fast.
Securing Accounts
- Use strong, unique passwords for every account, especially admin panels.
- Enable two-factor authentication wherever possible.
- Watch for any unfamiliar senders suddenly appearing in email logs.
- Use email authentication protocols like SPF, DKIM, and DMARC to detect unauthorized use of domains.
- If accounts are compromised, work with your ESP to screen traffic for any unusual activity indicative of hackers.
Staying secure minimizes the risk of becoming an unwilling spam conduit.
Avoiding Future Blacklisting
Once you address the root causes of blacklisting, staying in the clear means vigilant prevention.
- Monitor spam complaints, bounce rates, and blocking by major ISPs for any problematic patterns.
- Perform regular audits of your email security, infrastructure, list hygiene, and authentication protocols.
- Use a third-party deliverability solution to identify potential issues before they trigger blacklisting.
- Test a sampling of each campaign by sending to known ISP domains and spam trap accounts to check deliverability.
Catching problems early allows you to self-correct before hitting senders’ red lines. An ounce of prevention beats having to beg for removal from email blacklists down the road.
Keeping your sender reputation pristine just takes knowledge of potential pitfalls and ongoing vigilance. Now let’s shift gears to damage control – recovering if you do end up blacklisted.

Consequences of Being Blacklisted
Alright, so you slipped up and landed on a major email blacklist. It happens to even the most seasoned email marketers. Don’t beat yourself up too badly—it’s never too late for redemption.
However, make no mistake: getting blacklisted can significantly hurt your email deliverability and business if you don’t act fast. Let’s look at some of the common consequences of finding yourself on the spammer naughty list.
Emails Stopped at the Door
The most obvious and immediate impact is your emails will start bouncing or getting filtered into recipients’ spam folders.
Instead of landing inbox, your beautifully-crafted campaigns hit a brick wall at the blacklist gatekeeper.
This happens silently and invisibly on the ISP’s servers before subscribers ever see your message.
One day you’re cruising along with a healthy 85% inbox rate. The next, it drops to 5% without warning. Suddenly your open and click-through rates plunge off a cliff.
These abrupt delivery failures are a strong signal your IP or domain got flagged. Time to start checking blacklists.
Collateral Reputation Damage
Easy enough to recover from a single blacklist, right? Just petition to get removed and move on.
Not so fast. The major blacklists share data. So getting put on one can quickly snowball.
Say Spamhaus blacklists your IP for a spam trap hit. SpamCop and Barracuda grab that data and add you to their lists too. Within days, you’re essentially blocked from sending to Yahoo, AOL, Hotmail, Gmail—you name it.
And remember those quietly maintained, private lists used by the ESPs? You likely got added to those too without realizing it.
Suddenly you’re labeled a spammer across the industry with no recovery in sight. This multiplier effect is what makes blacklists so devastating.
Business Fallout
Ultimately, what matters isn’t just delivering to the inbox—it’s driving revenue. And blacklisting can significantly impact the business metrics that matter most:
- Lost leads – Emails filtered as spam means fewer potential customers ever see your message.
- Lower conversions – If existing customers don’t get your promotional or transactional emails, they can’t buy from you.
- Higher unsubscribes – Subscribers who aren’t getting emails as expected tune out and opt-out.
- Disengaged customers – Out of sight, out of mind. Lack of communication deteriorates relationships.
- Damaged brand reputation – Being labeled a “spammer” tarnishes your sender reputation and public image.
Each blocked email represents lost opportunities for engagement, revenue, and growth every single day. For companies highly reliant on email marketing, blacklisting can devastate the bottom line.
Minimizing the Damage
If you find yourself unfairly blacklisted, act quickly to get back delivering.
- Petition for removal while adhering to any requested sender improvements.
- Try switching IP addresses if needed to start fresh.
- Send more conservatively while monitoring ISP blocking and spam folder rates.
- Communicate with subscribers about the issue to preserve trust and engagement.
- Consider warming up your sending on a new domain with careful volume pacing.
With some finesse, diligence, and trust-building, you can escape blacklist purgatory. But prevention is obviously the best policy when it comes to maintaining your sender reputation.
How to Check if You’re Blacklisted
Uh oh. You just sent a big promotional email campaign but aren’t seeing the usual volume of opens. In fact, your inbox rate seems suspiciously low.
Time to find out whether your IP address or domain got blacklisted, locking you out of subscribers’ inboxes.
There are two main ways to check your standing:
- Public blacklist checkers
- Private blacklist indicators
Let’s explore both approaches.
Checking Public Blacklists
The easiest way to check is using public blacklist monitoring tools. Just enter your sending IP address or domain and these services crawl all the major public blacklists to see if you’ve been flagged.
Some of the most popular public blacklist checkers include:
- MXToolbox – Comprehensive lookup covering 100+ lists
- MultiRBL – Checks 30+ blacklists and includes last detection date
- WhatIsMyIPAddress – Easy blacklist check with immediate results
- DNSBL – Validates against major lists like Spamhaus and Spamcop
- Barracuda – Leading security provider’s IP reputation tool
- Talos – Cisco’s blacklist checker with threat reputation info
- Spamhaus – Direct lookup on their widely-used lists
For example, let’s check the status of 192.168.1.1 on MXToolbox:
[Insert screenshot of blacklist check result showing IP is not listed]
The green checkmarks indicate this IP address is not currently listed on the checked blacklists. A red flag would mean newly blacklisted.
If your IP does show up on public blacklists, you’ll need to petition the list owners for removal while addressing any issues. More on that shortly.
Indicators of Private Blacklisting
However, public blacklists are only part of the story. Major ISPs and ESPs maintain internal, proprietary blacklists that are not publicly searchable.
How do you check status on those hidden lists outside your control? Watch for indirect symptoms:
Plummeting Inbox Rate
If your inbox rate percentage suddenly drops across the board, you may be blocked at the ISP level without realizing it.
Tools like 250ok](https://250ok.com/) and [Mail-Tester can check inbox placement rates for specific providers.
Spam Folder Appearances
When recipients report your emails going to spam or promotions tabs, that indicates provider-level blocking.
Ask subscribers across Gmail, Outlook, Yahoo, and other major ISPs to check folder placements.
Bounce Spikes
A sudden, widespread uptick in bounces is another sign of blocking. The messages are getting rejected rather than filtered.
Monitor bounce rates closely, especially “failed SPAM checks” notifications, to catch any unusual spikes.
Traffic Source Dropoffs
If you notice significantly decreased opens from one traffic source like Gmail or Outlook only, that points to potential issues on that provider’s blacklist.
Check your email analytics for any outlier traffic drops relative to baseline rates.
By triangulating data from multiple sources, you can confirm suspected private blacklisting and begin remediation. An ounce of prevention is also key for avoiding both public and private lists.
So now that you know how to monitor your status, let’s get into recovering from the dreaded blacklist.

Getting Removed from a Blacklist
So the dreaded day has arrived. You check your blacklist status and find your IP or domain squarely on the naughty list. Now what?
First, take a deep breath. You can recover from this. Being blacklisted isn’t a life sentence. Most major lists have removal processes in place.
Getting delisted takes a bit of work, but it’s very doable if you follow protocol. Here’s a game plan for recovering your sender reputation:
Step 1: Identify Why You Were Blocked
Don’t just blindly request removal. First, dig into why you ended up on the blacklist in the first place.
- Review your email logs and metrics leading up to the blacklisting.
- Check if any campaigns had abnormal complaint rates or bounces.
- Look for any technical changes like new IP addresses or sending domains.
- Audit your email security and infrastructure for vulnerabilities.
Understanding the root cause will show you what needs remediation so issues don’t resurface after removal. Don’t sweep problems under the rug.
Step 2: Communicate With the Blacklist Owner
Most major blacklists like Spamhaus and Barracuda have published procedures for requesting blacklist removal.
- Visit the blacklist operator’s website and find their delisting policy page. This outlines their removal process and requirements.
- If required, fill out their delisting request form or send a removal request email.
- Clearly explain the circumstances that led to blacklisting, being sure to outline any mitigation steps you’ve taken.
- If relevant, provide updated technical records like valid SPF and DKIM records showing improved infrastructure.
- Be patient but persistent in communicating. Some blacklists have reputations for slower responses. Follow up if you don’t hear back.
Cooperating fully with the blacklist operator’s policies is key—they hold all the power, so appeasement is your best bet.
Step 3: Immediately Fix Any Problems
To avoid winding right back up on the blacklist, you must address the root problems before reinitiating email campaigns.
- Adjust email copy, content frequency, segmentation, etc. to improve subscriber satisfaction.
- Thoroughly scrub your lists by removing bounces, inactive users, etc. to improve hygiene.
- Update any technical issues with infrastructure, authentication, security, etc.
- Carefully warm up email volume if necessary to avoid spikes that seem suspicious.
Make substantive improvements first, otherwise removal is just a temporary band-aid. The blacklist operator will be looking for evidence you’ve cleaned up your act before lifting the block.
Step 4: Monitor Deliverability After Re-Listing
Once reinstated, don’t let your guard down! Closely monitor inbox placement rates and other metrics across ISPs to ensure delisting success.
- If deliverability doesn’t improve, you may still have underlying issues to tackle.
- Consider sending test emails from new IP addresses as a control to compare against any blocks.
- Check spam folder rates to see if your sender score improved but is still marginal.
- Keep communicating with the blacklist operator if problems persist after removal.
Be hyper-vigilant to ensure your deliverability rebounds and stays consistent. One wrong foot could land you right back on the blacklist and do further damage.
Avoiding Future Blacklisting
Now that you’ve done the work to get removed, staying off any blacklist for good comes down to vigilance:
- Monitor complaint rates and bounce rates for any concerning spikes.
- Perform ongoing list hygiene and remove inactive subscribers.
- Send conservatively and throttle volumes after sudden surges.
- Regularly check blacklist status using multiple tools.
- Test emails across ISPs to catch potential blocks early.
Learning from past mishaps will make you a smarter, more security-conscious sender going forward. You’ve got this!

Tips to Avoid Blacklists
They say an ounce of prevention is worth a pound of cure. Nowhere is that more true than avoiding the headache of email blacklists.
A few simple precautions upfront can save you from the rigorous removal process down the road. Let’s run through some key tips to keep your sender reputation squeaky clean.
Cultivate Permission-Based Lists
The foundation of inbox success is having recipients who explicitly want to receive your emails. Building quality lists takes work, but pays dividends through higher engagement and lower complaints.
Gather Direct opt-ins
The best subscribers proactively sign up to receive your emails by:
- Filling out your website opt-in forms
- Checking opt-in boxes at purchase
- Providing their email address directly to you
These high-intent subscribers translate to higher open and click rates, more sales, and extremely few spam complaints.
Prioritize single opt-ins
While double opt-in is great for list hygiene, the extra step slightly limits sign-ups. Using single opt-in grows your list faster while still maintaining quality.
Send new single opt-in subscribers a “welcome” email to confirm deliverability before blasting promotions.
Import engaged contacts
Identify top prospects from your CRM records, like:
- Recent customers
- Active website visitors
- Tradeshow leads
If they’ve already engaged with your brand, chances are they’ll be happy receiving your emails. Just make opting out easy.
Always honor unsubscribes
When someone opts out, immediately remove them from your lists. Sending to unsubscribes damages sender reputation and risks spam complaints.
Suppress unsubscribes at the ESP level too for good measure. Losing a subscriber is better than being labeled a spammer.
Fine-tune SPF & DKIM Records
Proper SPF and DKIM setup authenticates your domain, reducing the risk of impersonation by spammers which leads to blacklisting.
Configure SPF
SPF confirms you as the legitimate sender of emails from your domain.
- Determine required SPF record values for your sending domain, IPs, and any third party systems.
- Add proper SPF record values to the DNS settings for your domain.
- Use SPF validation tools to confirm correct syntax and formatting.
- Monitor SPF pass rates in email client logs. Failures indicate issues.
Enable DKIM
DKIM encrypts signatures on outbound emails to validate authenticity.
- Check whether your ESP has DKIM integrated and enabled by default.
- If handling DKIM yourself, generate public and private keys using an encryption tool.
- Add public key details to the DNS text record for your domain.
- Confirm DKIM authentication passes in email headers.
Together, SPF and DKIM provide layered protection against spammers sending from your domain.
Keep Tabs on Bounce Rates
High bounce rates are a telltale sign of list decay that can lead to blacklisting. Monitor this vital deliverability metric closely.
- Review bounce reports in your ESP and note any spikes following campaigns.
- Categorize bounces by type—hard vs. soft, syntax vs. mailbox full, etc.
- Identify high-bounce recipient domains and investigate potential issues.
- Remove or reconfirm any addresses with repeated hard bounces.
- Assess whether stale lists or faulty imports caused a bounce influx.
Keeping bounce rates consistently below 2-3% indicates your lists are healthy.
Send Consistently
Gradual, steady volume growth is best for deliverability. Avoid drastic spikes in sending activity which can appear spammy.
- Slowly increase monthly email volume as your lists expand.
- Add new segments cautiously and monitor deliverability before going full blast.
- Throttle daily send limits, especially for campaigns with newer segments.
- When possible, break large campaign batches into smaller sends distributed over multiple days.
- Temporarily decrease volume if you see complaint rates rising or detect blacklist issues.
Taking it slow allows your sender reputation to ramp up safely over time.
Follow Email Best Practices
Rounding out your prevention plan should be adhering to some key email excellence principles:
Personalize outrageously
The more targeted and relevant your emails, the higher engagement and lower complaints you’ll see. Spend time studying your segments’ needs and messaging that resonates with them.
Obsess over list hygiene
Continuously review lists for inactives, bounces, unsubscribes etc. and prune accordingly. Bad data leads to bad deliverability.
Prioritize mobile optimization
With the majority of emails opened on mobile, flawed mobile rendering tanks engagement. Review mobile and desktop versions during testing.
Send valuable content
Don’t blast spammy sales pitches. Provide tangible value through your content and subscribers will look forward to receiving it.
Monitor metrics closely
Watch complaint rates, blocking by major ISPs, unusual traffic drops—anything indicating deliverability issues. Nip problems in the bud.
Mastering permission-based list building, authentication protocols, volume pacing, and overall email excellence minimizes your risk of blacklisting in the first place.
Now let’s look at some “safety net” techniques to further bulletproof deliverability.
Maintaining Good Deliverability
So you’ve mastered email best practices and are successfully avoiding blacklists. Don’t get complacent!
Maintaining your hard-earned deliverability requires ongoing vigilance. Let’s explore some key maintenance strategies to lock in inbox success.
Step 1: Obsess Over Engagement
Engaged subscribers are less likely to complain about or unsubscribe from your emails. So focusing on engagement ensures your content gets to the right recipients.
Personalize every message
Use merge tags, transactional data, web activity, and CRM intel to make each email resonate specifically with the reader.
Write irresistible subject lines
Spend extra time crafting subject lines that build curiosity, convey value, and compel opens. Research what drives clicks for each audience segment.
Structure for scannability
Respect subscribers’ limited attention. Use concise paragraphs, bolded subheads, numbered lists, and other scannable formatting.
Send a variety of content
Beyond promotions, educate with tutorials, entertain with humor, or inspire subscribers through storytelling. Variety and value drive engagement.
Make interaction frictionless
Embedded voting polls, interactive calculators, live chat, and one-click unsubscribe make participating effortless.
Test and optimize
A/B test subject lines, content, designs, timing etc. to see what your audience best responds to. Then double down on what works.
Step 2: Maintain List Hygiene
A clean, current subscriber list prevents issues like bounces and spam complaints that threaten deliverability.
Confirm opt-ins
Ensure all subscribers genuinely consented to receive your emails either directly or via a partner. Document evidence of opt-in where possible.
Remove hard bounces
Delete any email addresses that repeatedly hard bounce to avoid continuous delivery failures.
Prune inactives
Filter out subscribers that haven’t opened in 6+ months to focus on truly engaged recipients.
Suppress unsubscribes
When someone opts out, immediately suppress their address at the ESP level to avoid mistakes.
Watch compliance metrics
Monitor abuse complaint rates, spam report rates, and blocks by major ISPs for any concerning spikes.
Ongoing hygiene takes work but preserves your list’s integrity.
Step 3: Monitor Your Sender Reputation
Tools like MailboxValidator provide an “email deliverability score” by aggregating your domain and IP reputation data from across the industry.
Monitoring this aggregated reputation metric can reveal issues before they escalate into full-fledged blacklisting.
[Insert sample reputation dashboard screenshot]
Look for any downward trends in your overall sender rating so you can be proactive with remediation. Deliverability is a marathon, not a sprint. Staying off blacklists requires diligence over the long haul. Don’t let your reputation slip through the cracks.

Key Takeaways: Avoiding Email Blacklists
Getting blacklisted can happen to anyone, but by understanding what email blacklists are and how they work, you can minimize your risk. Here are the key takeaways:
- Email blacklists are databases of IP addresses and domains associated with spam or abuse. Major ISPs and mailbox providers use them to filter out suspicious senders.
- You may get blacklisted due to factors like high spam complaints, purchased lists, poor email hygiene, sudden volume spikes, or security issues.
- Consequences include emails going to spam or not being delivered, damaging your sender reputation and costing you customers.
- Monitor public blacklist checkers and watch for indirect signs like reduced inbox rates to detect if you’re blacklisted.
- Recovering requires submitting removal requests to blacklist operators and transparently addressing any issues that led to blacklisting.
- Build engaged, permission-based lists, authenticate your domain, pace sends conservatively, and follow email best practices to avoid blacklists.
- Keep monitoring key metrics, maintaining list hygiene, and honing re-engagement skills to sustain deliverability long-term.
- With knowledge and vigilance, you can master the delicate art of inbox deliverability while steering clear of harmful email blacklists.
Frequently asked questions
What is an email blacklist?
An email blacklist is a database of IP addresses and domains that have been associated with sending spam or abusive messages. Major email providers use blacklists to filter out emails from senders with poor reputations.
How do you end up on a blacklist?
Common reasons for blacklisting include high spam complaint rates, poor email hygiene like high bounces, suddenly increased sending volumes, security issues, and purchased email lists. Any signals of spammy behavior can land you on a blacklist.
What are the consequences of being blacklisted?
Blacklisting prevents your emails from reaching inboxes. Subscribers will not get your messages. It damages your sender reputation and can result in losing business and unsubscribes from frustrated recipients.
How do you check if you are on a blacklist?
Use public blacklist checking tools by entering your IP address or domain. Monitor your inbox placement rates across major ISPs for signs of blocking. Increased spam folder appearances also indicate blacklisting.
How can you get removed from a blacklist?
Submit a removal request to the blacklist operator documenting what caused the issue and steps you’ve taken to improve. Fix any problems with your email practices before asking to be delisted. Removal can take time.
How do you avoid ending up on blacklists?
Follow best practices like permission-based list building, proper sender authentication, engaging content, and consistent volume pacing. Monitor complaint rates and other metrics closely. List hygiene is also key.
Can you automatically remove yourself from a blacklist?
No, there are no instant or automatic ways to get removed. You must follow the blacklist operator’s removal process and demonstrate improved practices before they will delist you.